Ever wanted to capture a TikTok dance or a cool gameplay moment on your iPhone but didn't know how to screen record? Look no further! This comprehensive guide will teach you how to effortlessly screen record on your iPhone, capturing all the action in high quality. Whether you're a content creator, gamer or just want to show a loved one how to navigate through an app, screen recording on iPhone is a handy tool that you should definitely know how to use. So, read on and become an how to screen record on iphone!
- Enabling Screen Recording:
Before you can start recording your iPhone screen, you need to enable the feature in your settings. To do this, follow these steps:
- Open the Settings app on your iPhone.
- Scroll down and tap on "Control Center."
- Under "Customize Controls," look for the "Screen Recording" option and press the green plus icon to add it to your Control Center.
Now, your iPhone is set up for screen recording, and you can access the feature from the Control Center.
- Starting and Stopping the Screen Recording:
Now that the screen recording option is enabled on your iPhone, it's time to learn how to start and stop the recording. Just follow these simple steps:
- Swipe up from the bottom of your screen (or swipe down from the upper right corner on an iPhone without a Home button) to open up the Control Center.
- You'll notice a newly added recording icon (a circular icon with a dot in the middle). Tap on this icon to start the screen recording.
- A 3-second countdown will begin, indicated by the recording icon turning red. Your iPhone will now start recording your screen.
- To stop the recording, tap on the red status bar displayed at the top of your screen (or the time in the upper left corner on an iPhone without a Home button) and select "Stop."
That's it! You have now successfully recorded your iPhone screen.
- Recording with Sound:
If you'd like to record the sounds and audio from your iPhone, you can easily do this by enabling the microphone in the screen recording. Here's how:
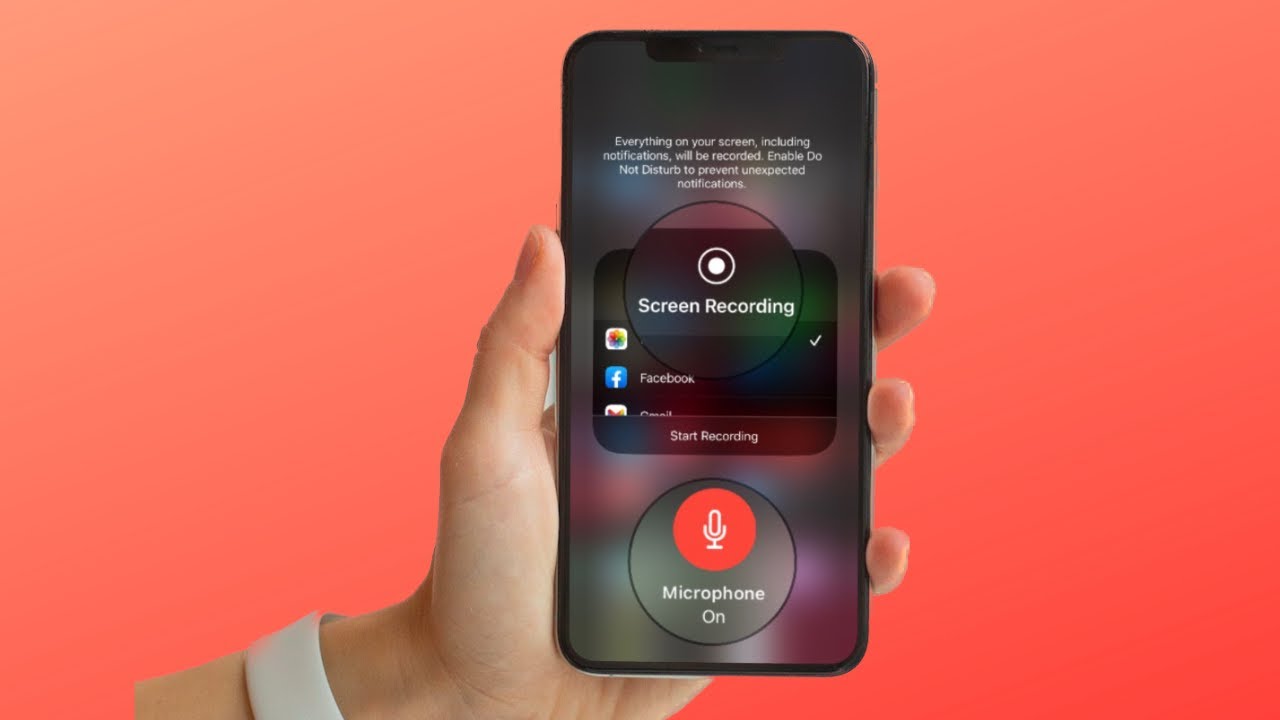
- Access the Control Center by swiping up from the bottom (or swiping down from the upper right corner on an iPhone without a Home button).
- Press and hold the screen recording icon to open up more options.
- You'll see a "Microphone Audio" option in the expanded menu. Tap on it to turn it on (it will turn red when enabled).
- Now, when you start the screen recording, it will also capture the audio from your iPhone.
- Editing and Sharing Your Screen Recording:
Once you've completed your screen recording, it will automatically save to your Photos app. From there, you can edit or share the video just like any other file on your iPhone. To edit or share, follow these steps:
- Open the Photos app and find your screen recording.
- To edit, tap on "Edit" in the top-right corner of the screen and use the provided tools to trim, add filters, or otherwise modify your recording.
- To share, tap on the share icon (a square with an arrow pointing up) and select the desired platform, method, or contact to share your screen recording.
- Troubleshooting Tips:
If you ever run into any issues with the screen recording on your iPhone, here are a few troubleshooting tips:
- Make sure you have enough storage space on your iPhone before starting a screen recording, as large files may fail to save due to a lack of available storage.
- Some apps, such as Netflix or banking apps, may block screen recording to protect copyrighted content or secure information. If the recording isn't working on a specific app, this might be the reason.
- Check for any updates to your iPhone's software, as screen recording issues could also stem from outdated software.
Conclusion:
Screen recording on your iPhone is a powerful and versatile tool that can enhance your content creation, provide help in sharing tutorials, or simply capture memories in a unique way. With this comprehensive guide, you're now well-prepared to expertly use the screen recording feature on your iPhone. Happy recording!


 icons at the top right corner of the subsection.